How to use the VSCode extension Remote-SSH with the cluster

Goal
Deport VSCode on a compute node and set limits to CPU and RAM usage
The extension Remote-SSH uses ssh to launch an instance of VSCode on another computer, and then the VSCode on your computer communicates with the one launched on the cluster.
We will configure a ssh alias in order use a compute node (through slurm) instead of the login nodes when using this extension.
Note
This tutorial uses VSCodium, which is a telemetry free version of VSCode.
Create a ssh alias
On our personal computer, we edit the file ~/.ssh/config as following (click on (1) to get a comment):
- A comment
| ~/.ssh/config | |
|---|---|
1 2 3 4 5 6 7 8 9 10 11 12 13 | |
- Define an alias name we will use with VSCode, here
genobioinfo-vscode. - Forward to cluster our ssh keys (optional).
- This line and the next are used to avoid breakdowns if nodes are reinstalled.
- Here we configure the connection to a node when VSCode will connect to the cluster. We use
srunto create a job that will runsocatto forward the ssh exchanges to the job itself. - The login to use to connect. Replace
<login>with your cluster login. - You can create other aliases with different slurm parameters according to your needs.
- The login to use to connect. Replace
<login>with your cluster login.
Save those modifications and run following commands on your computer to test the configuration:
srun: job 123456789 queued and waiting for resources
srun: job 123456789 has been allocated resources
srun: error: ioctl(TIOCGWINSZ): Inappropriate ioctl for device
srun: error: Not using a pseudo-terminal, disregarding --pty option
Warning: Permanently added 'genobioinfo-vscode' (ED25519) to the list of known hosts# We are now connected to a compute node and we check ithostnamen001exit
If you get something similar to that, you are ready to use the Remote-SSH extension in VSCode.
Zed users
Those aliases were tested successfully with Zed 1.0.
Don't forget to close project (In menu File -> Close Project) before quitting to stop the underlying slurm job (or use scancel after quitting)
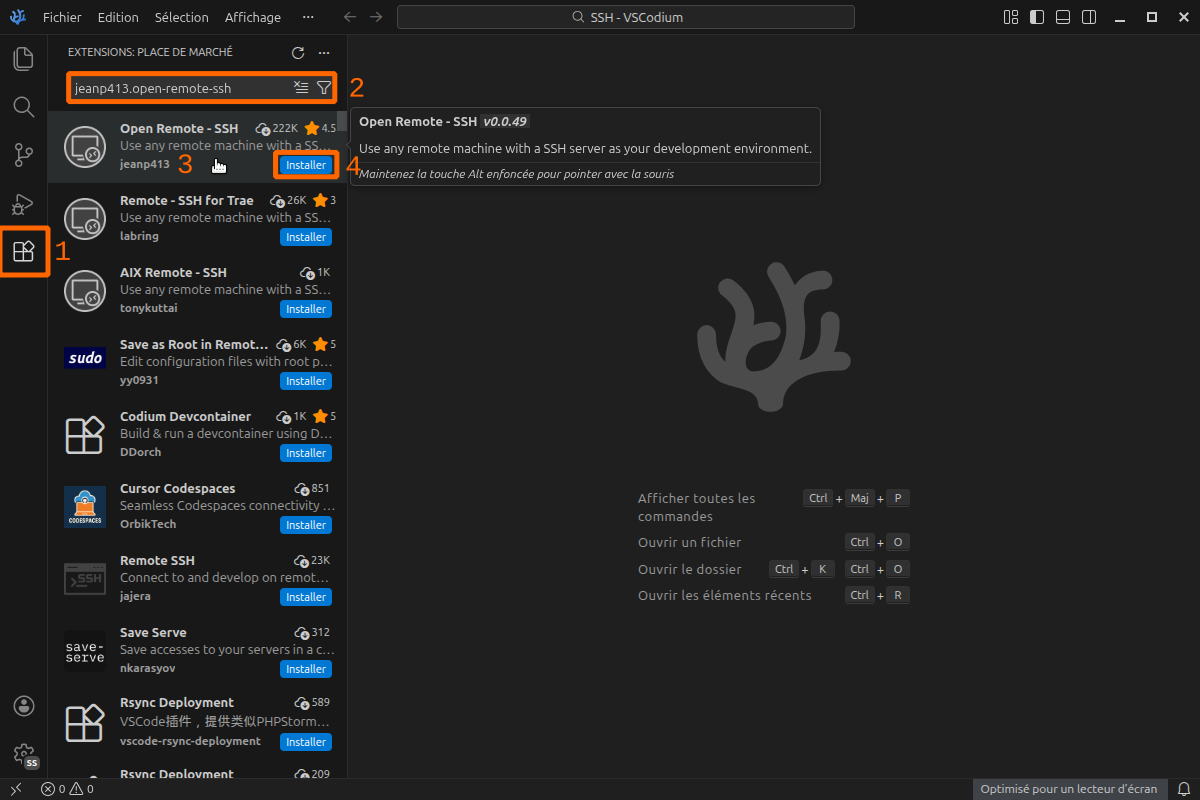
Install Remote-SSH
- Click on the Extension tab on the left side of VSCode.
- Search for Remote - SSH in extensions. You can use following extension ids depending your editor flavor:
- For VSCode Remote - SSH -
ms-vscode-remote.remote-ssh - For VSCodium/Positron Open Remote - SSH -
jeanp413.open-remote-ssh
- For VSCode Remote - SSH -
- Check the extension editor if multiple results.
- Click on install button.
After installation, a new tab on left side must have appeared.
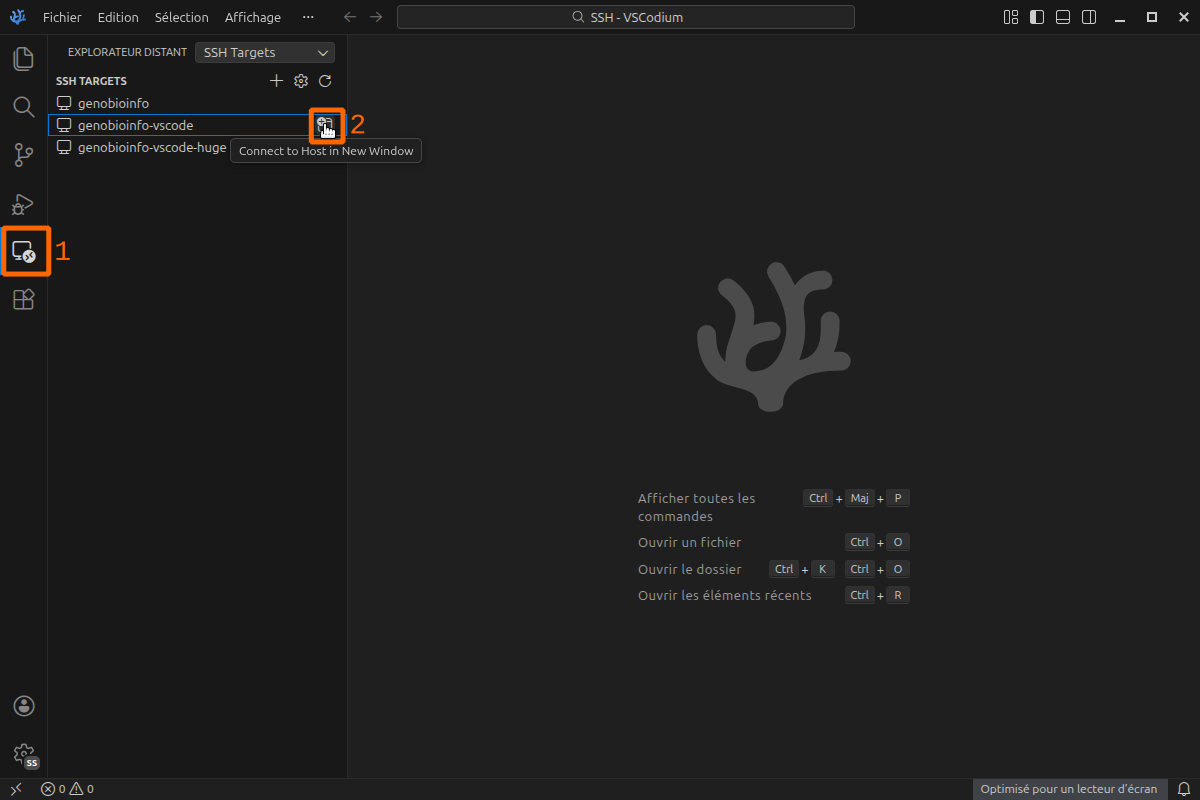
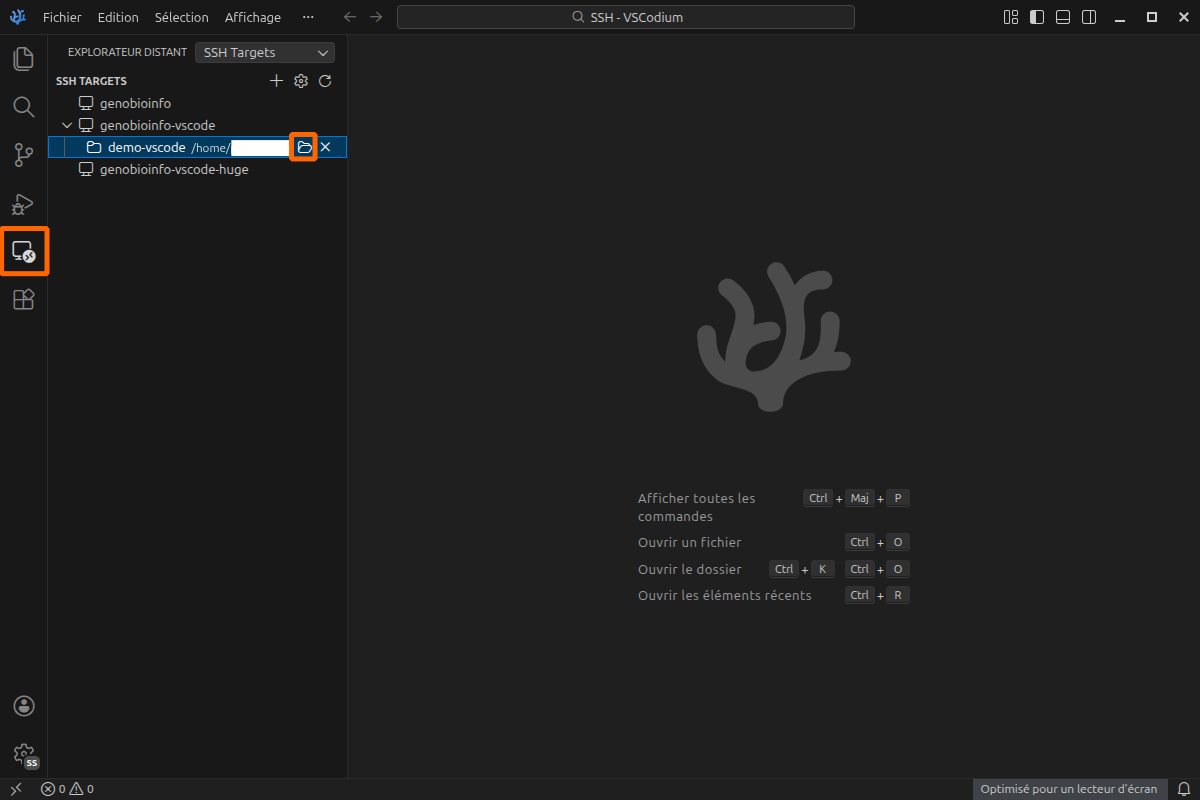
Connect to the cluster
- Click on the Distant Explorer tab on the left side of VSCode. List of alias from
~/.ssh/configfile must appear. - Click on folder like icon on the right side of the
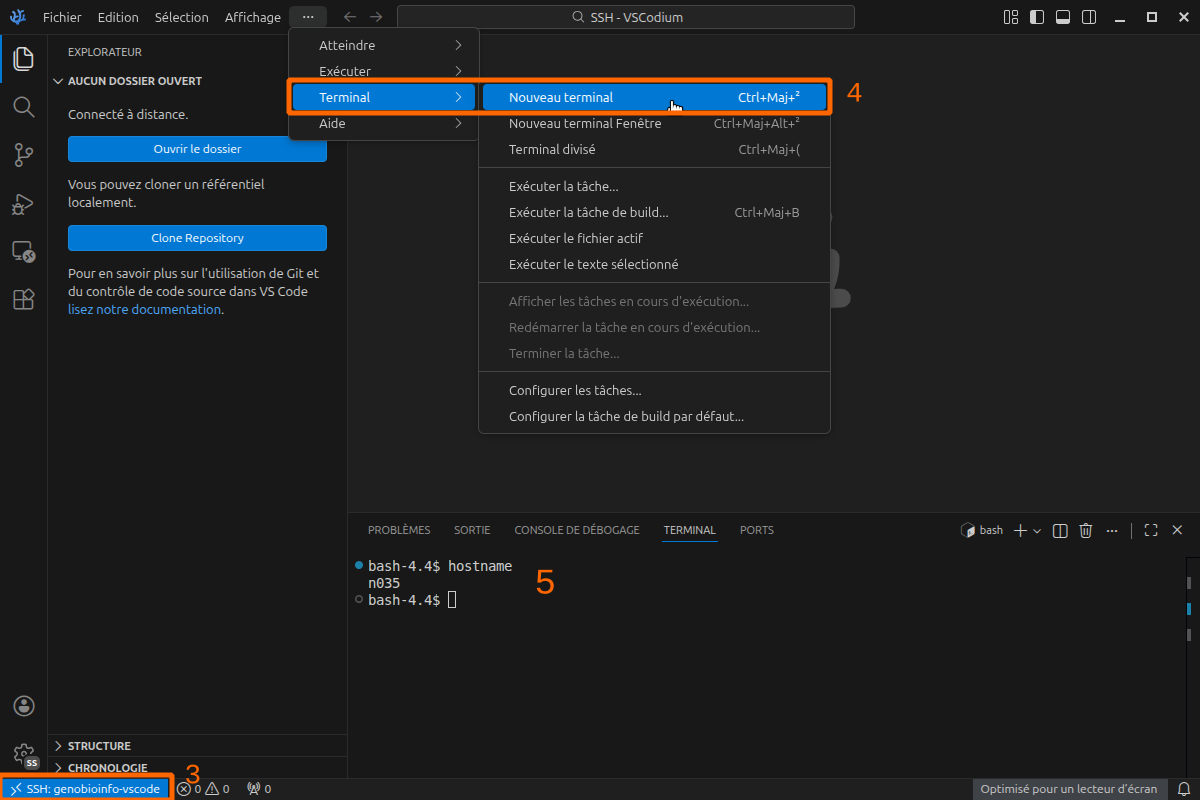
genobioinfo-vscodealias. A new VSCode window must appear and after few seconds you must be connected. Alternatively, you can right-click on alias to choose to connect in a new or in the current window. - You can check that our are connected by looking at the bottom left of VSCode window. You can see the text
SSH: genobioinfo-vscode(or any alias name you used for connection) - You can check the node you are connected by opening a Terminal in VSCode with menu Terminal -> new terminal,
- and type command
hostnamein it. You must get the node name. If you getgenobioinfo1orgenobioinfo2, something get wrong.
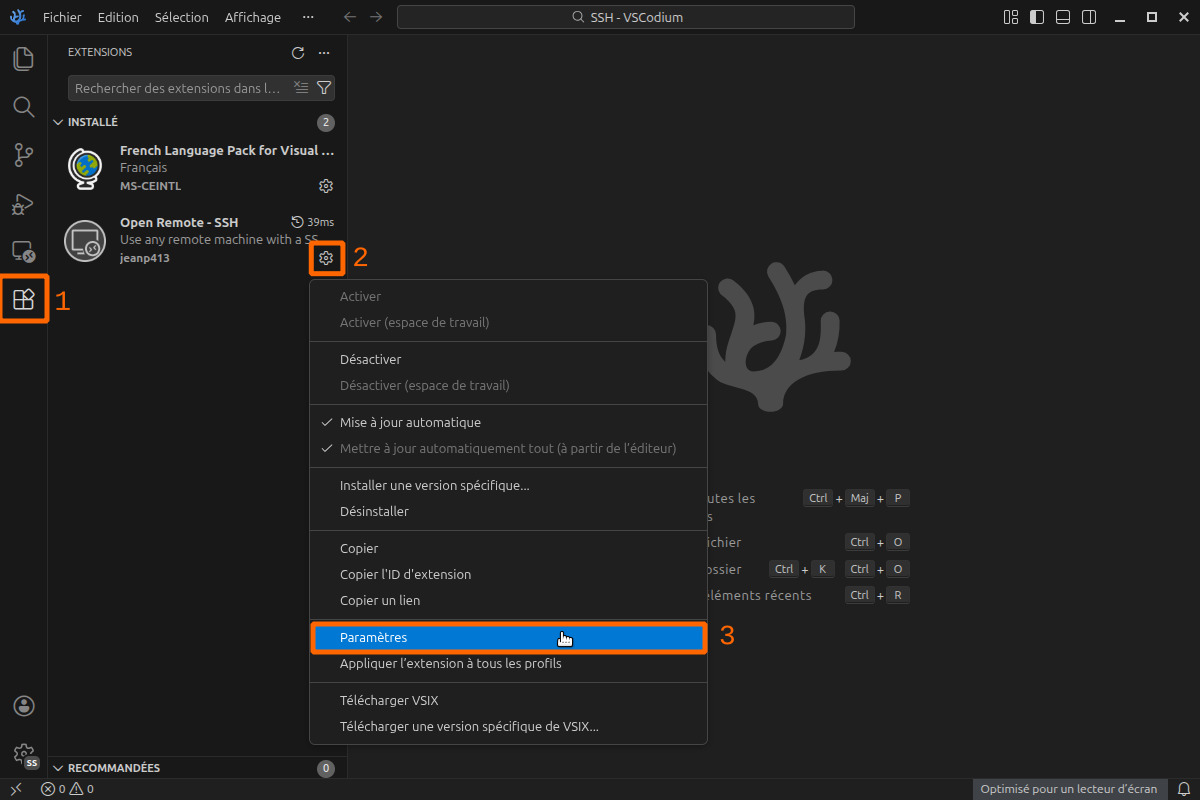
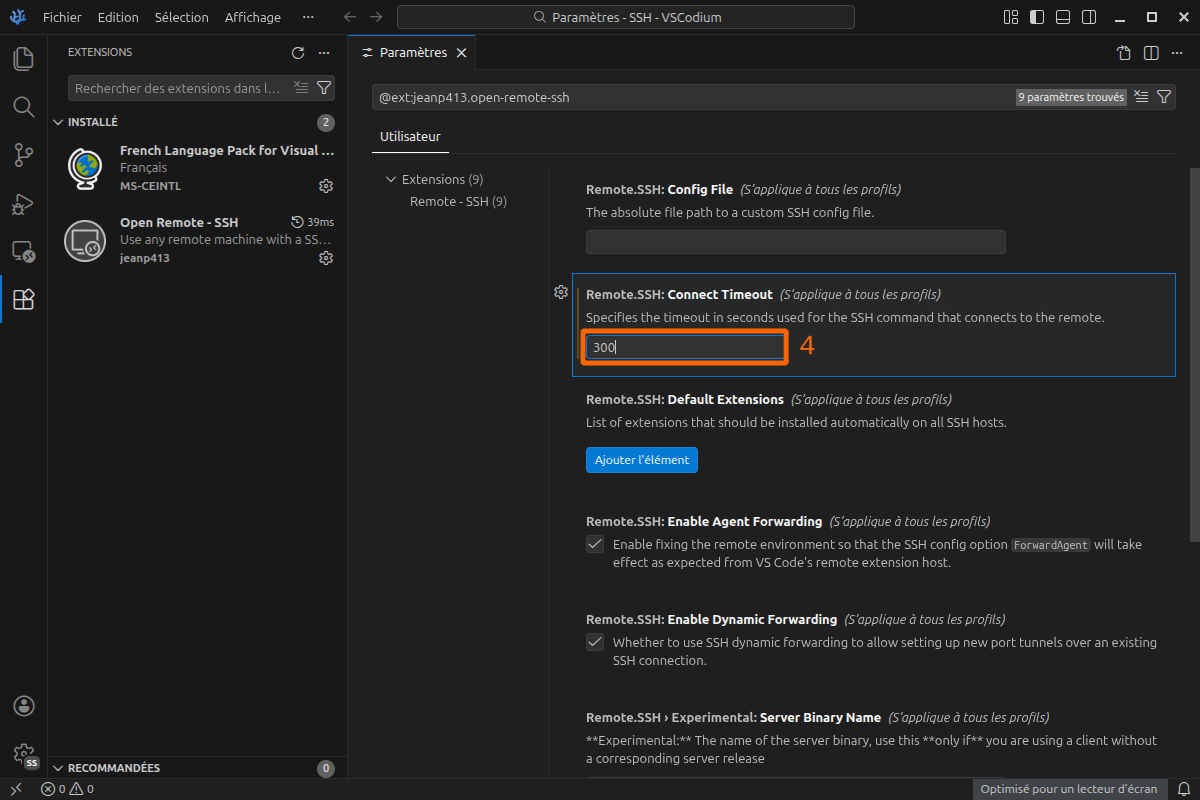
Manage timeouts
If the cluster is overloaded by many users, you will get a message similar to this one:
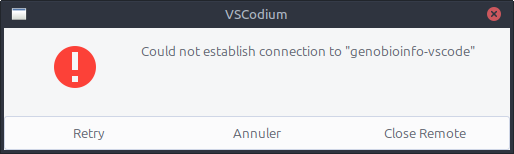
You can increase the time before failure this way:
- Go in Extensions Tab on the left.
- Click on the Manage button (the clog wheel). A menu appears.
- Click on the option Parameters in it.
- Set a higher value in field "Connect Timeout", for example 300 seconds.
Go to workspace
- Go to Explorer tab on the left side.
- Click on Open folder
- Navigate to your project folder with the menu at the top of the editor
- Trust the authors.
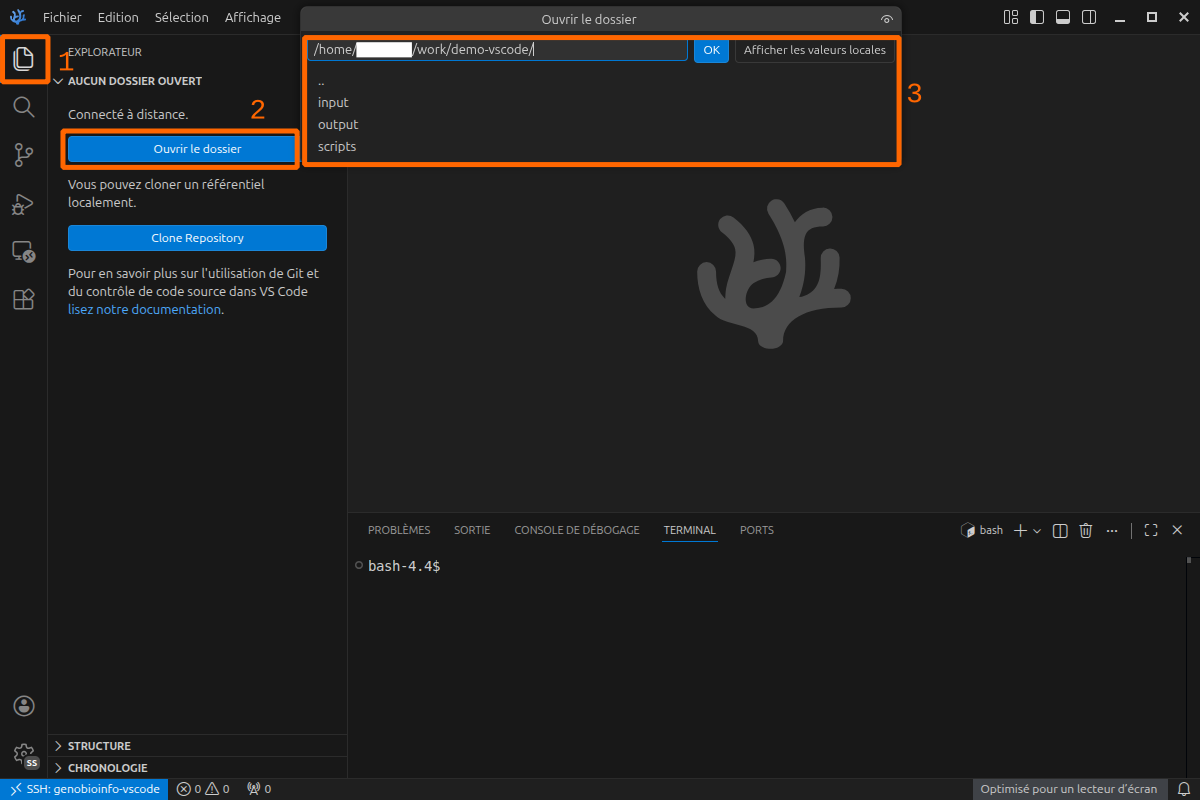

Now you are in your workspace.
Next time you will go to the Remote Explorer tab (on the left side), you will be able to connect directly to this workspace.
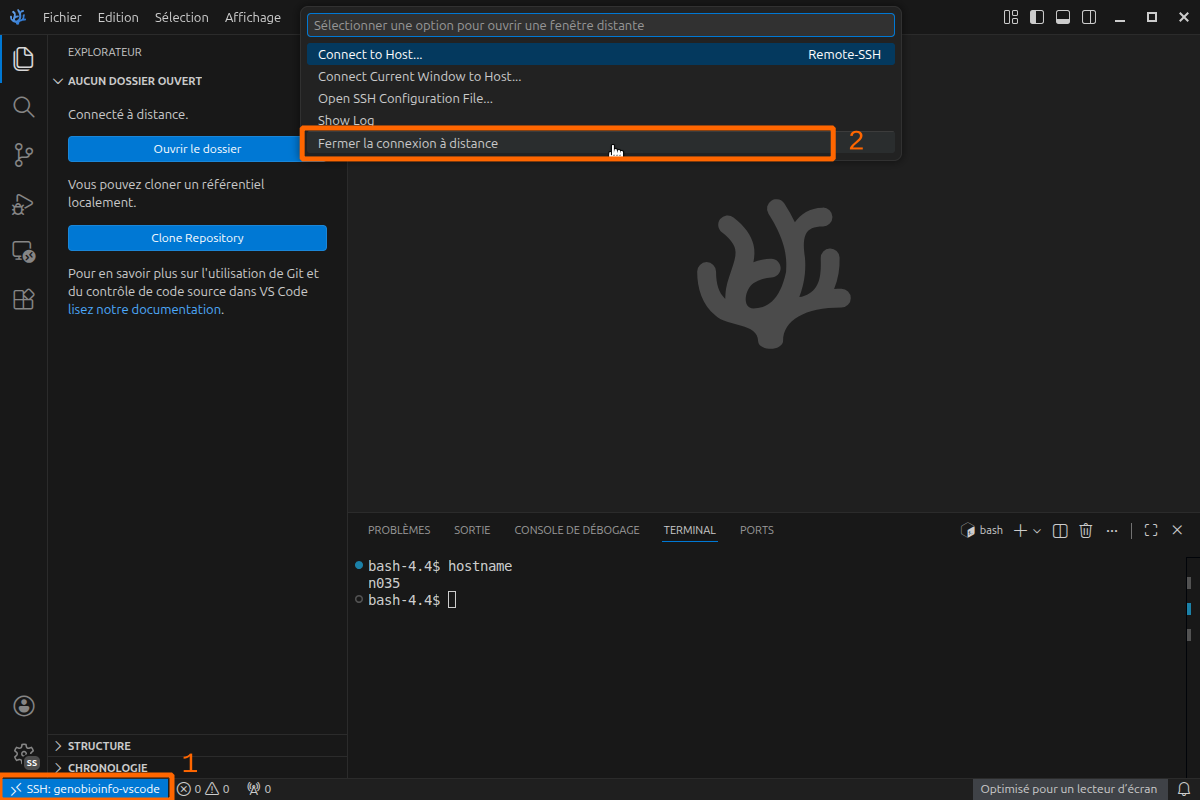
Disconnect
- Click on the text
SSH: genobioinfo-vscodeat the bottom left of VSCode window. It opens a menu on the top of VSCode. - Click on Close the remote connection.
Restore your bash terminal
You can restore your usual bash environment in the integrated terminal by editing your settings.json in such a way (source):
| ~/.config/VSCodium/User/settings.json | |
|---|---|
1 2 3 4 5 6 7 8 9 10 11 | |
Clean your home
Each time you run a new version of a VSCode like editor, it stores many data in your home directory.
You can move the editor folder from the home directory to the work directory, but it is not a long term solution.
You must type a command like this one to remove old versions and free space.
Alternate aliases
If aliases provided on previous section fail, you can try following alternatives that use salloc in place of srun in the ProxyCommand part (line 5).
The difference between both alternatives below lies in the variable $SLURM_NODELIST in ProxyCommand that must be escaped depending of the extension (Remote - SSH or Open Remote - SSH), the extension version, and the OS (Windows or Linux/macOS).
You must test both of them and keep the one that works. Don't forget to replace <login> with your cluster login.
First alternative
| ~/.ssh/config | |
|---|---|
1 2 3 4 5 6 | |
- The login to use to connect. Replace
<login>with your cluster login.
Second alternative
| ~/.ssh/config | |
|---|---|
1 2 3 4 5 6 | |
- The login to use to connect. Replace
<login>with your cluster login.